Dungeons of Freeport Log 3 – Gameplay & Tools
The end of the year had me busy with other things so I didn’t as much done as I’d wanted (on anything, really, apart from a robust form of melancholy) but… with the intended milestone finally hit, it’s time for another dev log.
This one is on tools and high level gameplay – that is, the map editor I created for DFP, how it’s used… and why it exists in a Roguelike.

A Map Editor in a Roguelike?
The most pure definition of a classical Roguelike is that, of course, the dungeons / spaces in it are procedurally generated. And if you’ve been at all following DFP’s development here or on Mastodon you will know that I have indeed spent some time crafting a procgen algorithm to create the dungeons.
So why a map editor?
The core reason is that for this specific game, I intend for there to be a hub world. Think the town in Diablo (another example of a Roguelike whose mechanics have been modified in a similar way).
The second reason is… I am a strong believer in letting players use your game in any way they enjoy. Modding in a full sense isn’t always doable (for instance, exposing the proc gen dungeon code for DFP would be tough as it’s all pure C++ and it’d be a pretty herculean task to expose it to LUA or the like), but given I need to make a map editor anyway to create the ‘town’… why not let players use it?

So I have put in the extra effort to not just hack together something I personally can use, but something which hopefully can be used to create whole bespoke dungeons. It may fly in the face of a ‘pure’ Roguelike, but given I am already taking it pretty far out of the realm of a classical Roguelike, why not let people make their own spaces?
This seems as good a time as any to explain the core loop of DFP, as it originally popped into my head, to explain why I spent the last month’s worth of work on DFP making a level editor (and making the town itself).
The High Level Gameplay Loop of Dungeons of Freeport
In the most classical, traditional Roguelike the game usually works something like this:
- Enter the dungeon at the first level when starting the game
- Fight your way down through the dungeon, acquiring more gear as you defeat monsters
- Depending on the specific game, either an infinite number of dungeons is made and how deep you get before dying is counted as some kind of score, or:
- You reach a ‘bottom’ level, perhaps fight a final boss, take an artifact, and have either won or must travel back up out of the dungeon levels before having ‘won’
Dungeons of Freeport is a bit different. It is designed to be played two ways. One is akin to Swords of Freeport – a single ‘turn’ a day played, with a persistent character you build up over time. This is based off the mechanics of ’90s BBS Doors.
The second way is for local users, who can play each ‘turn’ one after another.
In either case, each ‘turn’ is a single ‘delve’ into a procedurally generated dungeon. It goes something like this:
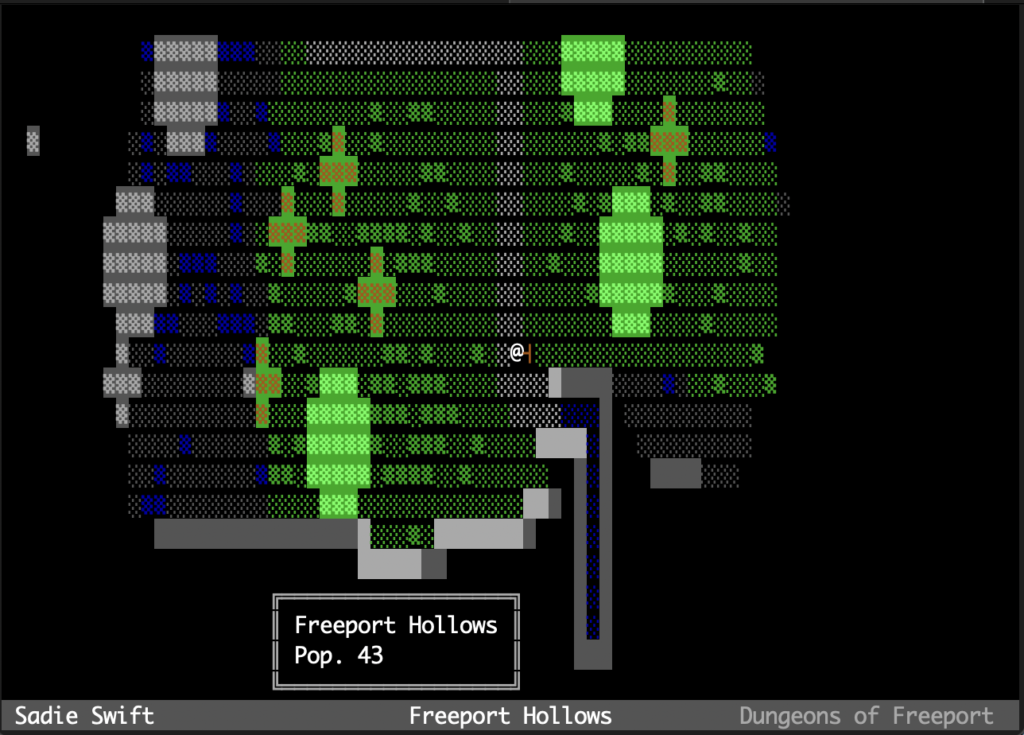
- Enter the town (for the first time or not)
- Stock up on supplies, buy/sell loot and gear
- Select which of your gear to leave behind in safety, and which to take with you for this delve
- Select one of three dungeons, each having a unique ‘type’ (a dungeon, a crypt, an oubliette, etc, each with unique rooms, loots and monsters) and a difficulty (indicating their intended level)
- Enter the dungeon and begin to search it for loot, killing monsters to level up your skills at the same time
- At a certain point, either clearing the final dungeon level or deciding you are too low on supplies to risk another monster encounter, you decide to return to the surface
- If you die, you lose your progress on your skills and whatever kit you took into the dungeon with you (with some caveats – there are ways to send gear back mid-delve, or get some rare gear back you lost due to dying)
- Either way, when back at the town, you can once again buy and sell loot & gear, and prepare for another delve – including renting or buying property which lets you store more gear and gain other advantages to help you with future delves
For those playing on shared servers (with leader boards, social boards etc as per Swords of Freeport) each day the server generates 3 possible dungeons, and the player must choose which to enter. Each player has access to the same dungeons, meaning they can converse about which ones are interesting, giving tips etc if they chose not to be the first ones into the dungeons each day.
Once a single delve is done on social instances, the player must wait until the next day before doing another.
For those playing single-player, another delve can be done immediately, if they desire.
Either way, each play turn will be broken up into a ‘delve’ of about perhaps 10-20 minutes of play time, and the core gameplay conceit is the risk/reward problem of continuing your delve to get more loot but risk it all… or returning what you already have.
In that way, it is not dissimilar from a modern extraction shooter, by way of a Roguelike.
The Editing Tools
The game’s editor runs within the game itself. While within the ‘town’ hub map, dev builds (and later builds with the feature enabled) can enter editing mode.
Information tiles can be shown/hidden by pressing the required number, including a help tile to prompt you with which keys do what.
The editor has several basic modes:
Tile Editor
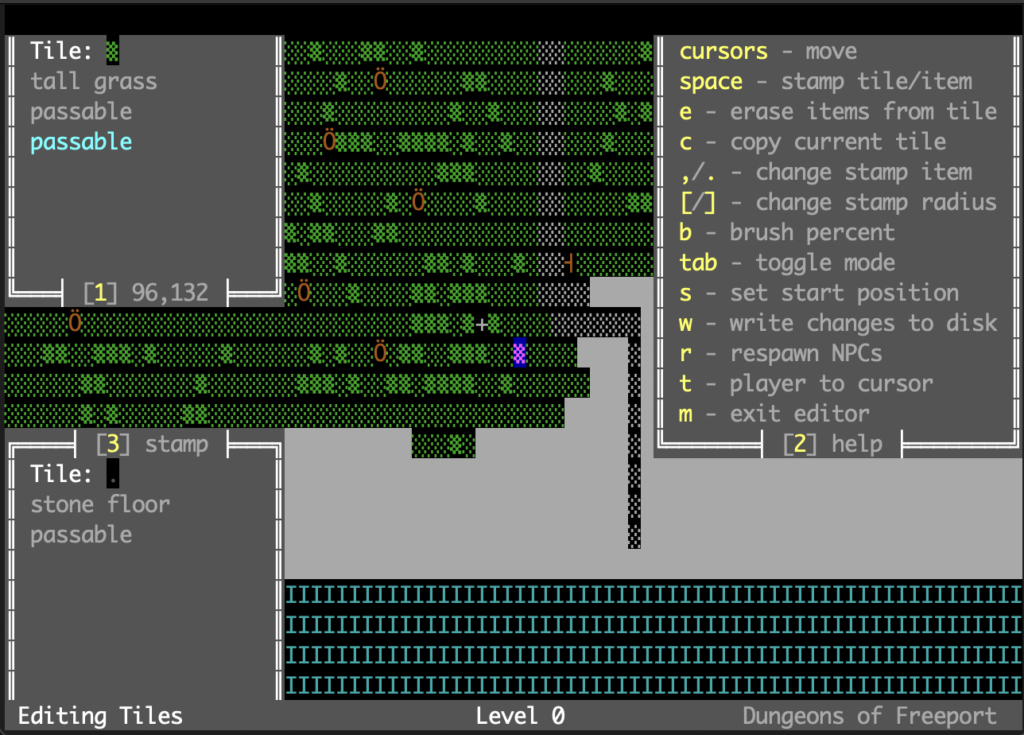
Unshockingly, the tile editor lets you modify the tiles directly. This includes stamping a radius of tiles, with a density perecent set to do things such as place high grass or dirt in random clumps.
Item Editor
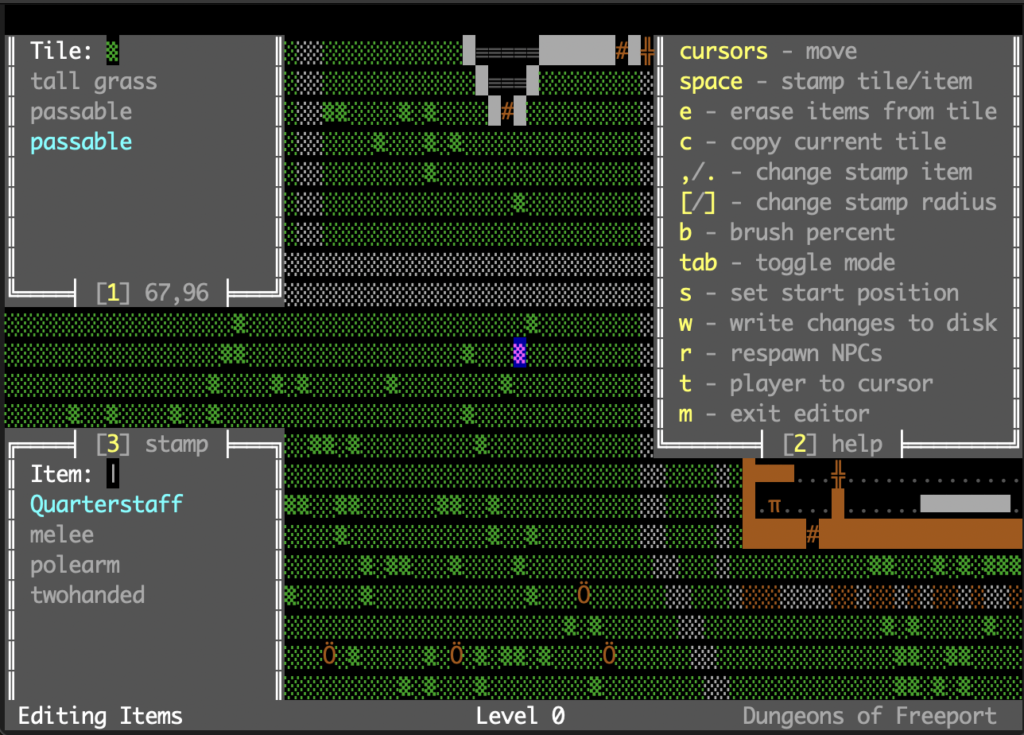
The item editor lets you place items in the game world. This includes, as other modes often have, copy/pasting. This makes doing things like placing numerous trees quite easy, or hiding items of loot about the place.
Placed Item Mode

In contrast to ‘item mode’, Placed Item Mode is used to modify the unique attributes you can give to an item. Many items, for instance, can have a unique text field. In some items this is multiline and contains, say, the text of a sign which will be displayed to the player when they walk adjacent to it.
Other times, this is a unique flag. For instance, containers can be locked or lockable, and the unique text field indicates what identifier of key can open it.
It also lets you see more detail about items – for instance, the weight, bulk and which item features they have. (It’s hard to give all this detail in the usual item screen, given the tiny 80×24 character screen it’s built around.)
Roof Editor
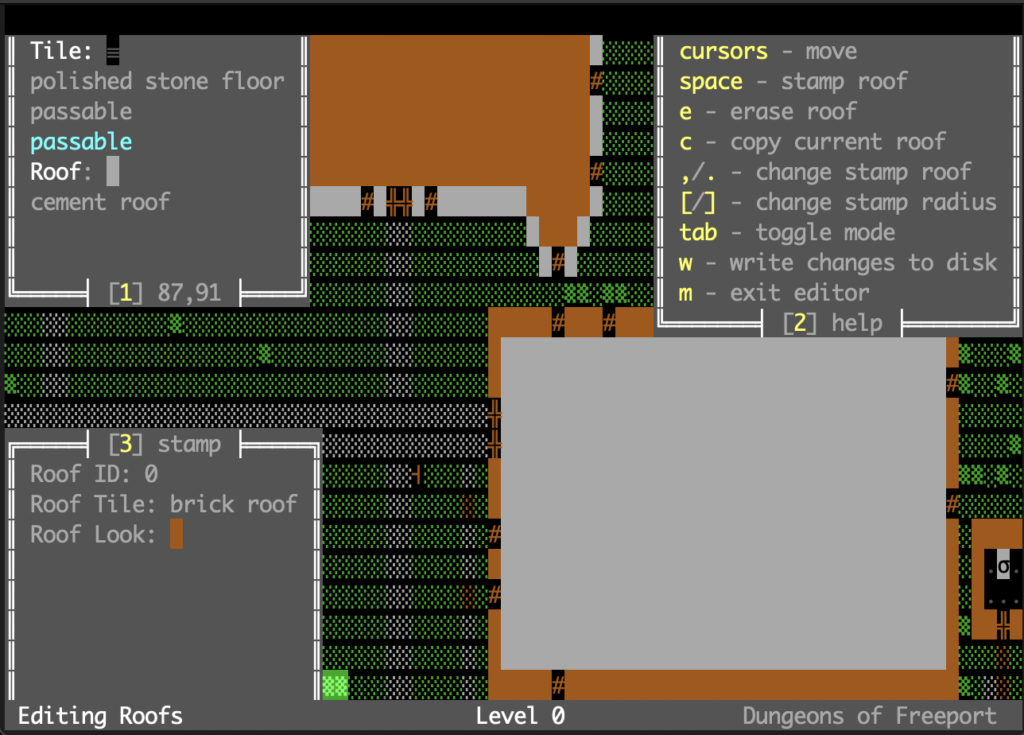
It will likely provide no surprise to the reader that the “roof editing mode” is used to edit roofs.
Rather than explain the obvious, I will give a brief rundown of how I have implemented roofs in DFP. Because hey! Why not.
Each tile has a ground tile associated with it, which is not optional. By default they are all stone, and they can be burrowed out from there. Each tile also has a roof set, which is optional and set to nil by default. Roofs are contiguous, so when the player walks onto a tile with a roof set, all the roof tiles contiguous to that block are hidden immediately, giving the ‘walking into a building’ effect.
‘Roof’ tiles though also serve another purpose – they can be used for tree canopies. Certain object types (trees are it for now) automatically, when placed in the world, put ‘foliage’ roof tiles adjacent to them out to a specified range. Walking under a tree therefore has the same effect as entering a building – the tiles under the tree instantly becoming visible.
I am fairly happy with how all this functions, as combined with Line of Sight, this same feature helps give a sense of a living world of plantlife, and buildings one can enter.
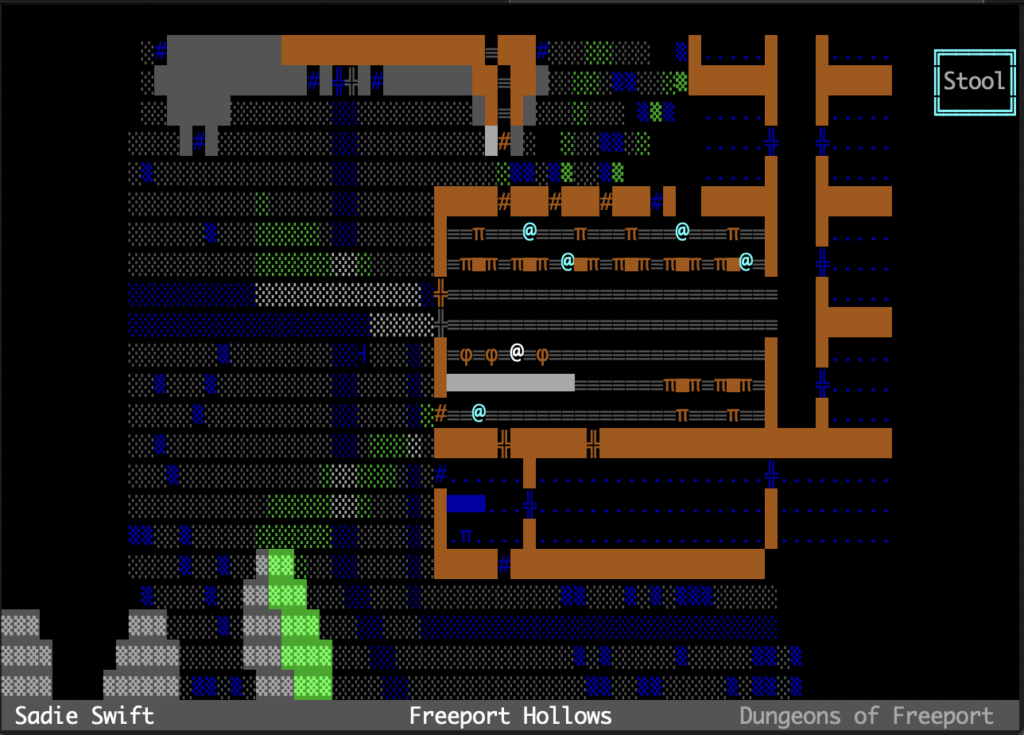
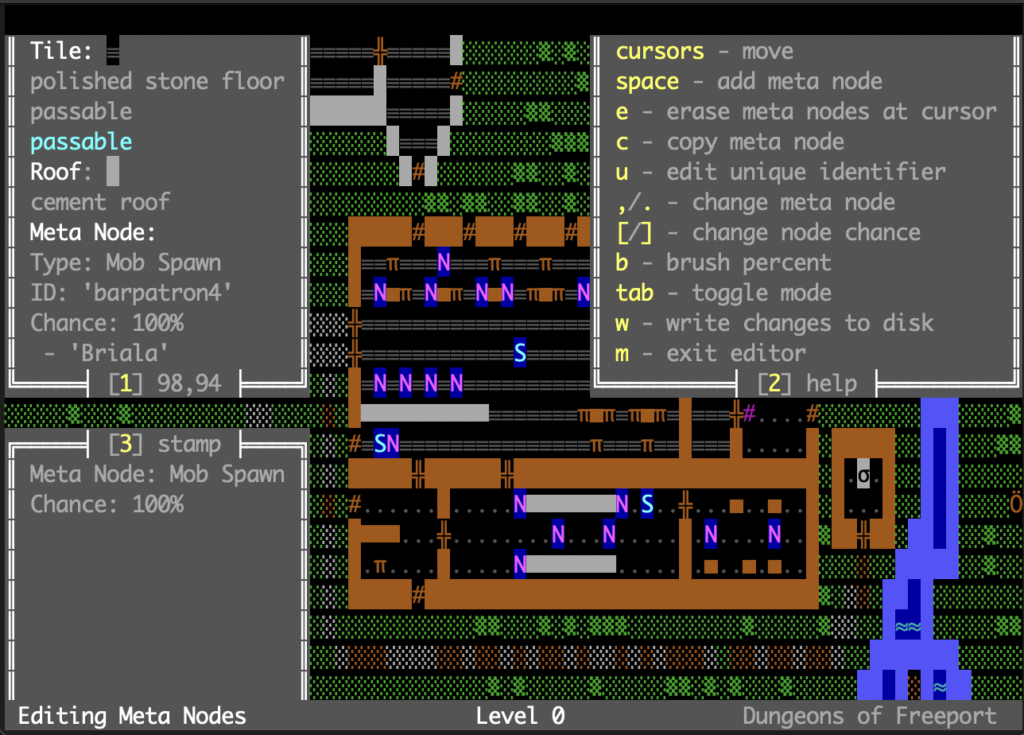
Meta Node Editor
Without NPCs to populate it, what is a town but… uh, well… a ghost town? Anyway, I already had mobs so it was pretty easy to add a few very basic NPC features. NPC AI has only one basic function – to move between nodes which are set to indicate where it should spawn or sit at.
Spawn Nodes do nothing but spawn an NPC (if they’re set to the correct ID of an NPC defined in the config files) but NPC nodes provide a possible destination or loiter positon for them. Again, these are given ‘sets’. So in their simplest forn a shopkeeper NPC can be given a ‘set’ containing just one node – having it sit forever behind their shop counter, so the player can talk to them or trade.
Other NPCs, such as the quarryman or a man who goes fishing at the creek, has numerous possible nodes, with wait times that can be random with in various scopes. This means that, for instance, going out to the creek will find the fisher NPC at a random place, or perhaps even moving between nodes.
The meta node editor is for placing, editing, and copy/pasting these nodes.
Conversation
While it would be quite possible to leave conversation trees out… to me it’s a huge part of any RPG, and if I’m adding a town with NPCs, why not add barks and the capacity to talk to them?
Barks are just notes when you bump into them, or they bump into you, and I have implemented a full conversation tree system.
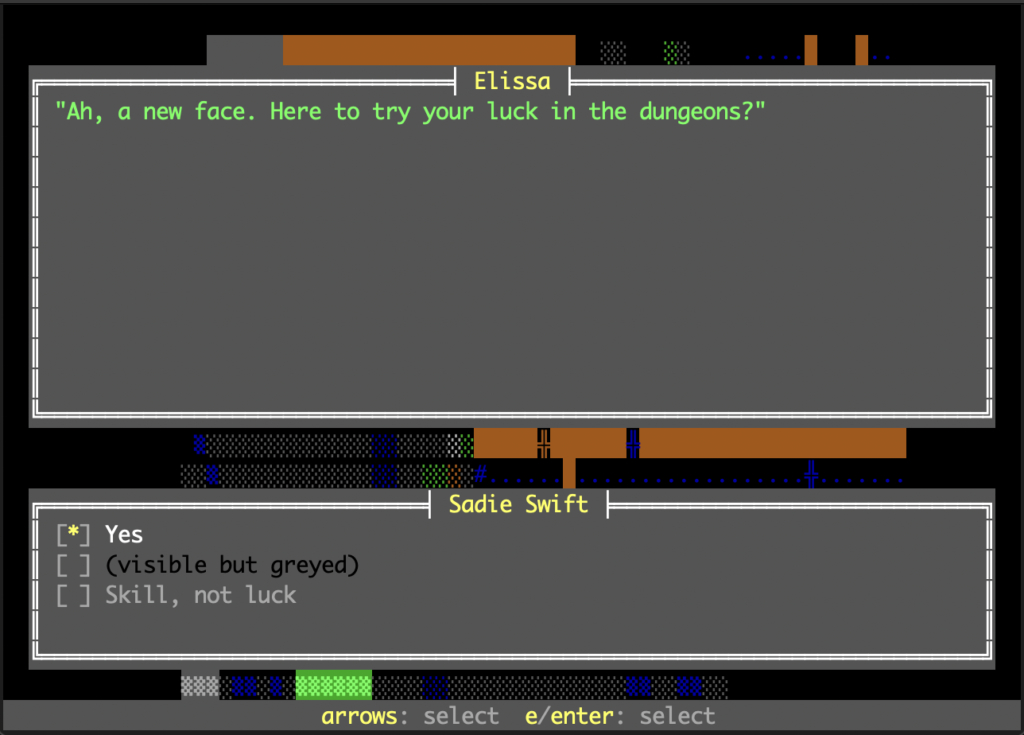
This meant, naturally – I had to build a conversation editor! Which began a… well, look, let’s go into the bit I wanted to bring up here. Welcome to one of the biggest problems in game development.
Sunk Cost Fallacy
On the surface, a conversation editing tool doesn’t seem that tough. Hell, I’ve written one before. The problem isn’t the mechanics of it. Or even the UI. It’s, in the case of Dungeons of Freeport… the space.
After a solid few days of making a a good chunk of the interface to allow me to enter conversations in a tool rather than into raw text files using the format I had designed, I began to hit a wall. At first I thought I was just tired, but then I realised: it was truly an annoying task. Not the size, but the nuance. Could I have knuckled down and finished it?
Yes.
But would the resulting tool, without immense work, be truly EASY to use? In that limited space? Without a mouse? Would it speed up the rate at which I could turn out conversation for the characters in game?
Perhaps…
But… if I simply modified the format of the text files to be easier to write by hand? The simple fact, I concluded, was that yes, that was a better option. It’d take far less time, and I could always make my own conversation editor later when I had more time, or perhaps even outside of the game itself – as my previous conversation editor was done in Swift as a native macOS app and my gods that was so much easier.
So… I scrapped my half finished code. Didn’t even want to leave it there to affect any future attempts.
It was, I think, one of the best decisions I made. Instead, I simplified the format for the conversation files.
The point of game tools is to speed up the capacity to iterate and add/modify content to your game. What this doesn’t mean is that everything needs to be a tool – or that you have to make them all bespoke. There’s a reason we don’t re-invent the wheel making 3d editors and pixel art editors every time we make a game – so in this case, a simple format and a good text editor was, I think, a superior choice than wasting yet more time trying to creat something usable within the obscene limitations of text mode tooling.
Conclusion
I’ve got more to talk about – I haven’t even truly covered the store and inventory code yet. But that’s for the next dev log, I think.
As for the tools… I am now fairly confident that barring a few minor features I might add, I’ve created what I need to streamline the remains of the hub world development process – and with some ease in future I will be able to expose these tools so players can use them to make, modify or tinker with either alternate hub worlds, or new dungeons.
Now? On to more gameplay mechanics – such as the dungeon types.