Ray, the Raycasting Engine
Having recently hit a pile of deadlines for my main projects, the last chunk of which resulted in me working 7 days per week, my partner used rather strong language to imply I needed to take some time off work. Which is… fair.
So, I set out to do so. The problem is, what I do for fun (write, make video games, sometimes do indie film stuff) isn’t just an overlap with what I do professionally it… really pretty much just IS what I do professionally. But I had sworn to myself that I wouldn’t touch my “main” projects (Deck & Conn and the Freeports [Hey, that makes a nice band name!]), which left me wondering what to do for a few weeks.
I decided I could let myself work on something fun. A side project, just for me. And something I’d been curious about for a long time is – a software-rendered Raycasting engine akin to Wolfenstein or Doom.
What is this?
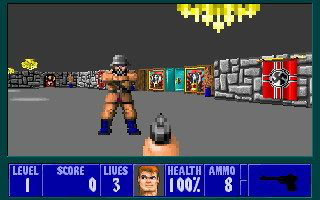
Growing up with these games, this aesthetic is one that always appealed to me, and along with being two of the most ground-breaking bits of video game tech in history, these two engines are probably the most well-documented ones in existence. The subject of articles, youtube videos, presentations, talks and even two incredibly detailed books.
So I decided to take a few weeks “off”, for the first time since about 2019. (Oof.) I didn’t just work on this project, of course – I went to museums, saw friends, and I’ve just generally had a pretty and relaxing time. It’s nice to make an engine where I can add features “just because” and where I have no real goal to produce a game with it that can cover my rent and bills.
This blog post will cover the development of Ray, the Raycasting Engine so far. What I did, why I did it, what I’ve learned, and what limitations I set (and broke) for myself in the process.
What it will NOT do is provide full source code, or anything like that. For several reasons.
- It’s a work-in-progress.
- No, really, it’s a work in progress. A lot of this is slap-dash.
- This isn’t so much a highly technical document as a little dive into the reasons I chose to various things.
- As mentioned above, there are absolutely TONS of really good tutorials and full source examples of how to do this kind of stuff already, including, of course, the actual source code for Wolf3D and Doom.
So, first up – what did I want to do, why did I want to do it, and what was I starting with?
To answer the last question first, I began using my own bespoke engine, Sapphia. The one I’m using for Deck & Conn and Dungeons of Freeport. In short, it’s a C++20 based engine using libSDL that handles 2d graphics (basically just sprites, animated and not), cinematics (fading things in and out, running actions), and a UI geared towards customisable interface objects.
But for this purpose, all I needed was a single graphics object – a custom sprite. I wrote a new one in the engine where you can feed it a surface full of pixels, and each frame if needed it’ll update the sprite on the screen. I then added basic putPixel routine, and that’s all I needed.
I ran the game at a virtual resolution of 640×360 (the 16:9 equivalent of SVGA’s standard res) and filled the screen with one of these custom sprites.
There was my software renderer.
So what did I want to do? In short, I wanted to make a Wolfenstein style raycaster, as I’d never made one before. And, specifically I wanted to do Wolfenstein, not Doom.
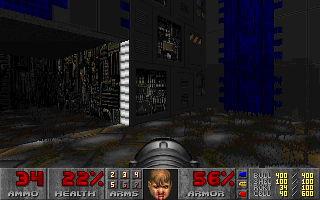
Note: the principle difference between Wolfenstein 3D and Doom’s engines are that Wolfenstein 3D was limited to a map of square tiles, with all walls being the same height and existing perpendicular to each other. Doom, meanwhile, used ‘sectors’ of arbitrary size and shape, with variable wall and ceiling heights. Between this and the lighting support, Doom was able to feel much more real and much more 3D for its time.
I could have gone Doom-style but having never written a 3d software renderer of any sort before, I wanted to start simple. So I figured, start with the basics – and I did.
And as for just why I wanted to do all this? To learn. I had no real goal, at first, of a specific game to make with it, I just wanted to learn how they worked. And the best way to learn how something works, is to do it yourself.
The Basics
So, fairly quickly, looking through tutorials, I had my first raycaster. No textures, no fanciness, just walls.
What makes a raycaster different from a full 3D engine? This has been covered everywhere, but in short: to render full 3d objects was basically impossible with any real speed in the early 1990s. So, to render a fast-paced 3d-looking world, the trick was to render it in 2d, essentially.
For each column on the screen, you cast a ‘ray’ out into the map, and when you collide with a wall, you track which wall it is (to figure out its texture or colour, and more) and how far it is from the camera.
Doing some math, you then figure out how tall the wall should appear based on its distance, and you render it as a single line. So at its most basic, you get this:
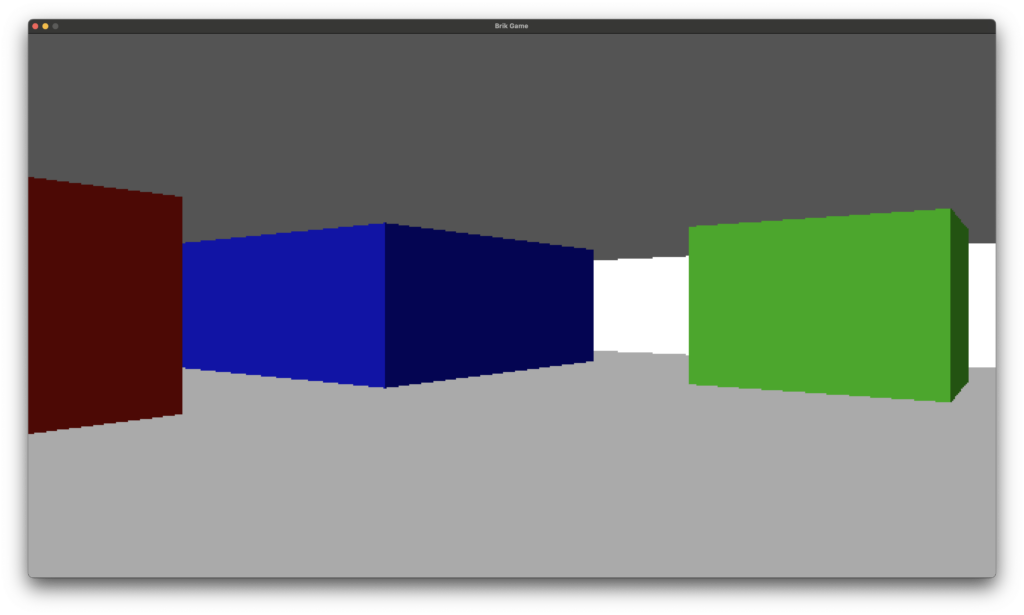
There are no textures here, just colours. So when you hit a tile, you determine its colour, and render a single line at the correct height and position.
If you’re feeling extra fancy, you can block out two colours in the top and bottom half of the screen first too, to give the impression of walls and ceilings.
One of the oldest tricks used to give a sense of depth and light when you don’t actually have any in your engine, is to render two of the wall faces darker than the others. So, for instance, the North and West facing walls might be a bit darker than the South and East ones, as seen above.
Note: this isn’t what I used to do my engine, but this video does a solid job of explaining the basics. If you want to understand what a raycaster is and how it works in a bit more detail, I suggest checking this out.
This was easy enough.
The next step was-
Textures

Wow! Look at that! Complete with bonus programmer art!
To do this, when you hit a wall, you don’t just determine what colour to paint it, you determine which point on the wall you hit. Knowing this point, you can grab the texture for the tile, figure out which column to draw, and then render that column per-pixel.
Of course, I skipped a step here. There’s something else the less stoned of you may have figured out from the above picture – I’m rendering ceilings and floors, too.
This is essentially just a variation of the same routine. You tilt it on its axis 90 degrees, and you can figure out which ceiling or floor you hit, and render that bit of its texture.
To avoid rendering more than you need, you can also create what I called a height buffer – when I drew a wall column, I remembered the top-most pixel I drew of it, and the bottom-most ones. This way when drawing ceilings and floors, I could hit those extremities and stop, not wasting my time drawing pixels twice.
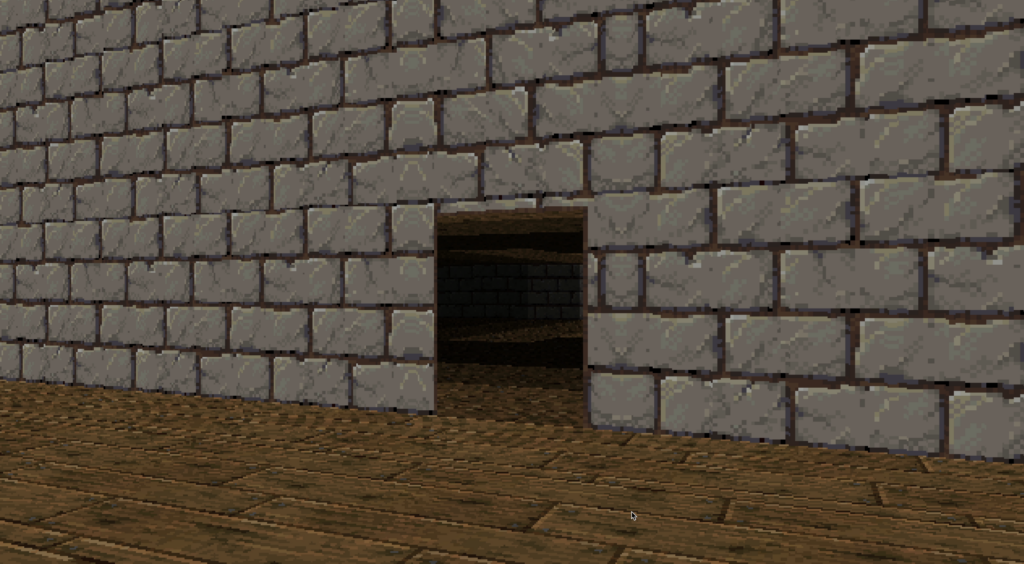
Having done this, I moved on to the next step. I had decided to set myself a limitation here – the square map tiles of Wolfenstein, not arbitrary sectors. Otherwise, I was free to add the features which felt ‘right’. And that first feature was-
Light
Now, on modern computer systems, you could easily add per-pixel lighting to even a raycasting engine like this. Our machines are more than fast enough. But to me, while that can look great in certain modern source mods to vintage games, it began to push too hard into “modern engine” territory, and would slow things down a lot when doing pure software rendering, too.
Hell, given many Doom source ports render using 3d, you can add the most advanced ray tracing around. (Note: Not to be confused with ray casting, which is what this engine is. The two terms are confusing similar and are even sometimes interchangeable, which sucks.)
This looks great. But, really, it doesn’t look retro, and doing software rendering? That was about seven steps beyond my current skill or interest levels.
So I decided to pick a fairly resource-cheap lighting system – I’d light each tile. This was the same technique I used in my first professional video game, TownCraft.
The result was good – and easy to implement. When you trace a path for each column, when you hit a wall you remember the most recent tile you hit before it, and use that tile’s current brightness to impact the pixels you draw. The result looks quite nice to my eye – vintage-looking, but kind of nice in its simplicity.
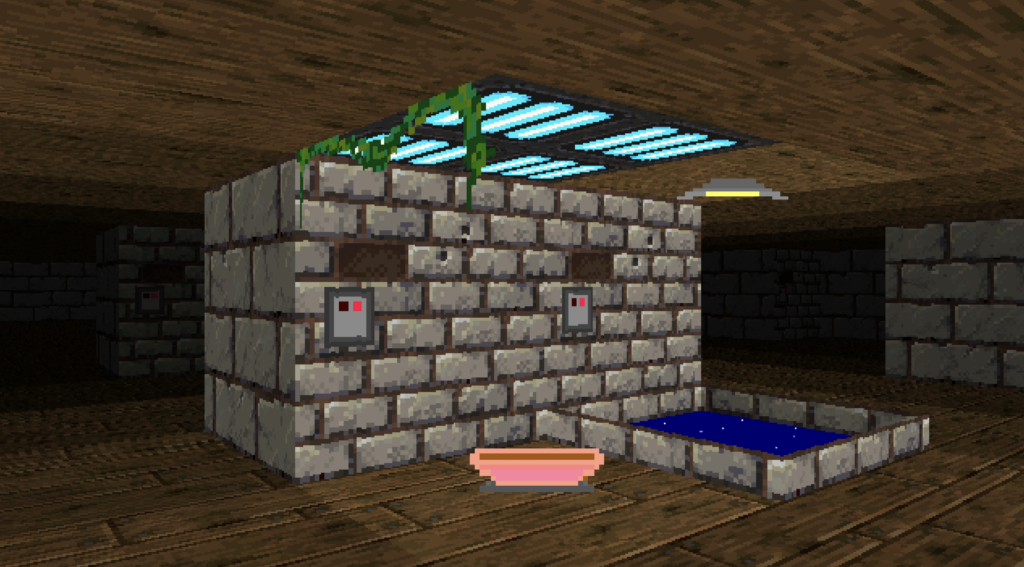
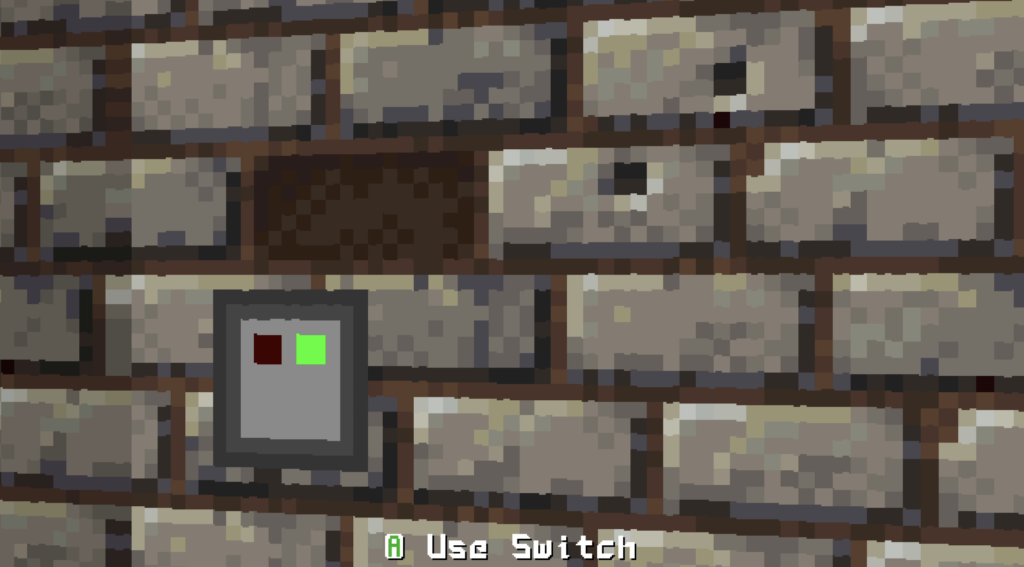
It’s trivial to have these lights be dynamic, too. I quickly had the option for lit tiles to flicker, to cycle between on or off, and even the ability for their state to be changed by outside interactions – such as a light switch, when I got to implementing such things.
The next step wasn’t so much an engine thing as a quality of life thing – I implemented an editor. A basic map editor in 2D. The maps were getting too annoying to hard code!

Next up, a critical addition to the engine was needed-
Objects, Transparent Walls & Depth Buffering
In a 2D engine such as this, objects are traditionally rendered as billboard sprites. That is, sprites which always face the player head-on. For monsters or other things that are a bit larger, multiple angles are often exported, and the correct sprite is shown based on the way the player and the enemy are looking.
This is pretty easy to do. You can determine the depth to draw the sprite, and just draw it. Here is a terrible programmer-art bowl I drew. Ignoring how bad it looks as a piece of art, it looks fine in-game. You can of course determine what tile it’s on, and apply the lighting of the tile to the sprite too.
Note: I also bought a 64px texture pack on Itch to use for this project, so I didn’t have to cause my eyes to bleed by staring at my coder-art textures.
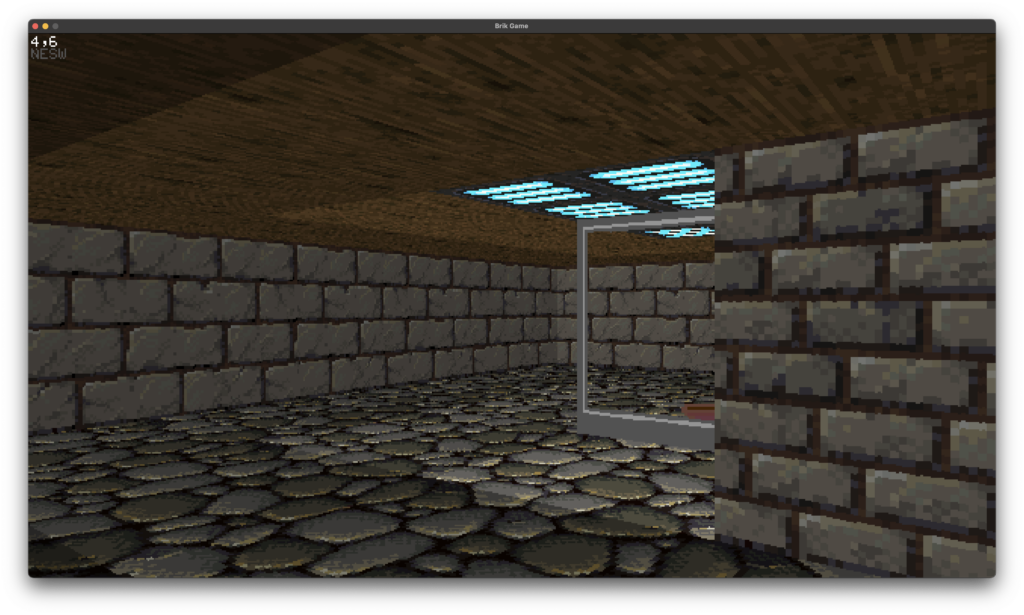
One of the issues with this engine as it stands. Well, not so much an issue as an inherent limitation, is that walls are solid. No exceptions. When a ray cast hits a wall, it stops and renders it. And because the first wall it hits is the closest and walls have set heights, there’s no need to check for and render walls behind it.
But there’s no reason I couldn’t add the ability to have transparent walls.
So I re-wrote the engine to support transparent walls – and more important, so walls sat between tiles, as opposed to a whole tile being either sold or not.
The basic mechanic for this then goes from
WALL RENDERER – ORIGINAL
- Cast a ray for the given column on the X axis
- Keep stepping forward until you hit a solid block
- When you find the solid block, render it.
- Repeat until the whole screen is done
WALL RENDERER – NEW
- Cast a ray for the given column on the X axis
- Keep stepping forward until you hit a wall
- Check if the wall is transparent or solid
- If it’s transparent, get the info needed to render it and add it to a Transparent Wall Cache, then keep stepping further back
- If it’s solid, stop the casting – we’re done, just render the solid wall
- Once all the rays are done, go back to our Transparent Wall Cache
- Do a second pass for each column. If the column has a Transparent Wall segment to draw, go ahead and draw any pixels which are solid
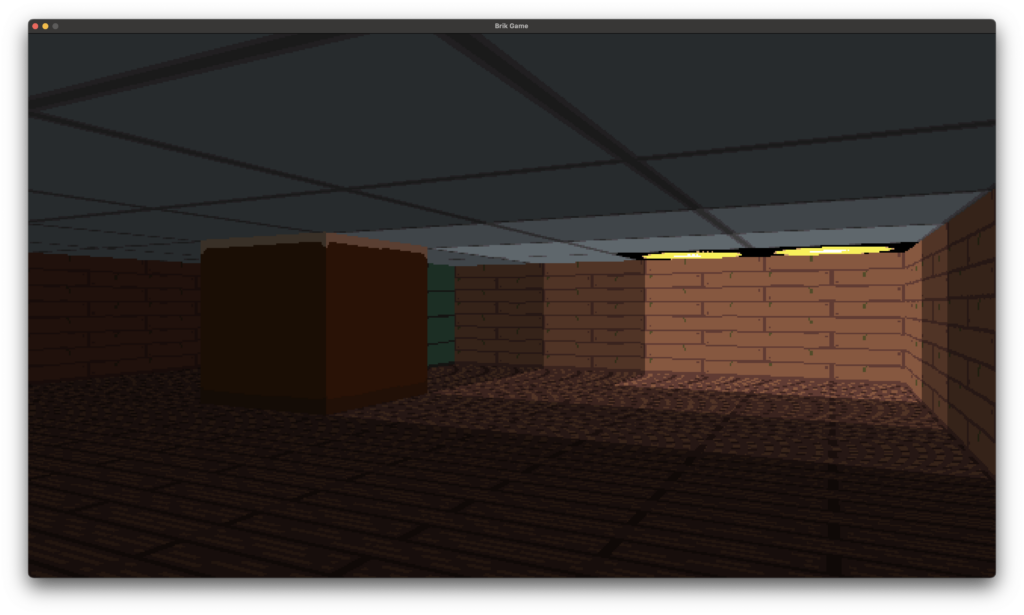
The end result of this is pretty nice. it’s still fast, and lets us have walls with windows missing, that you can see the rest of the map through. My test example here is ugly, but it shows how it works:
Of course, there’s a problem here. As you can see, the bowl, which should be in FRONT of the transparent wall, is clipped behind it.
Now, the typical system for rendering objects with clipping in this sort of engine is often to remember a depth buffer. A 2D one is enough. Across the X axis of the screen, for each column, you remember the depth of the wall you hit. When drawing your sprites, you simply check if the sprite’s distance from the camera is behind the depth of the wall you drew. If it is – you don’t draw it. Simple!
The problem is, this falls down when you have transparent walls.
So I fell back to a more resource intensive option – a 3D depth buffer. It chews up more ram than you’d spend back in the day with this kind of engine, but doing one had a bunch of advantages, so I did it.
In practice, what it means is that my engine then had its own sort of ‘depth image’ of the world it drew, where each pixel on the screen remembered the depth the latest object part it drew was.
So when drawing more than one wall, or more than one object, you can just check against depth buffer for that pixel, to determine if it needs to be drawn or not.
I even got to lose the old ‘wall depth’ 2d buffer, and instead just use my existing depth buffer for everything.
By now, this resulted in the engine being able to do some pretty cool stuff. Here are examples:
But we’ve all seen a million dungeons in these sorts of games. This is where I wanted to be different. I wanted to make something I’d never seen before – a game with a focus on something other than dungeony small-room stuff, and probably more than just shooting.
It’s not that I don’t like a good vintage shooter, but there’s a million really good ones out there and being made right now, of all sorts from Doom-style to early 3D style.
And fast paced action is not really my jam, as a designer.
So what had I never seen before in this kind of engine?
Well, slow paced games were rarer, of course. You had things like Strife which added RPG elements to the Doom engine, but for the most part complex thoughtful games like Thief or Deus Ex came later, in the real-3D era.
So that became a focus of mine. Interaction. Objects. And mostly?
Exterior Spaces
Using my new skybox stuff, I could do some ‘outside’ areas well enough. Of course, these engines aren’t ideal for such things, but hell, Duke3D managed some good city environments, so why couldn’t I?

But to do cities, I would need roofs for my buildings. And that’s annoying with this kind of engine. Not impossible, but annoying.
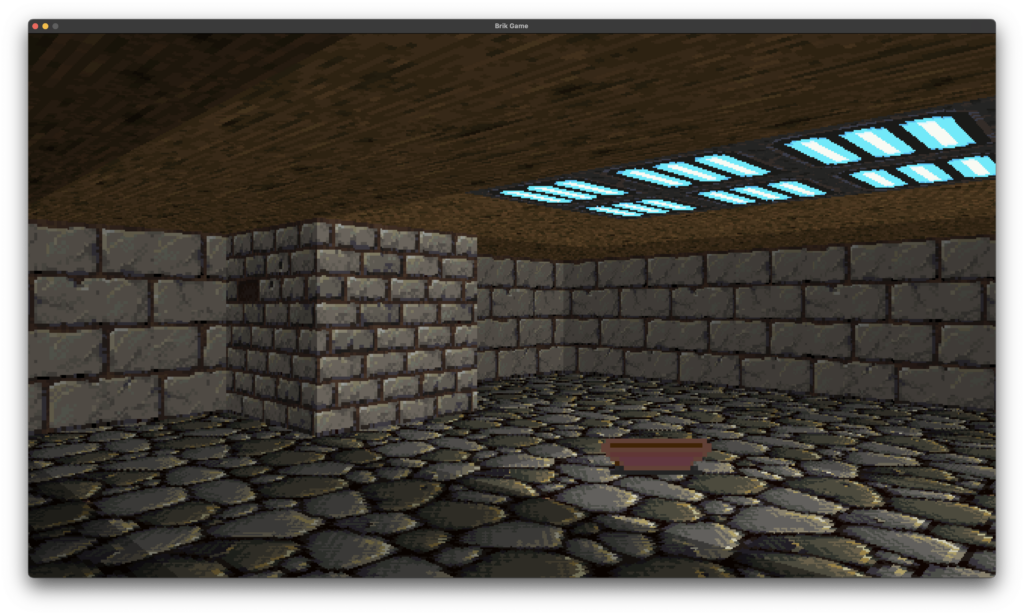
But.. what about a city? In my engine you can’t look up or down, so what if the walls were simply too high to see the roofs?
To do this, I simply added a new feature to walls. They could have an ‘alt texture’. If they had one set, and there was no ceiling above their tile, they would, rather than stop rendering at the top of the wall height, keep going forever. They’d just keep drawing their alternate texture, looping back to the bottom if they got there, until the top of the screen.
So doing big city laneways and huge tall buildings towering of the player became possible.
Voila! Exterior walls.
But given I could do ceilings, tall walls, skies, and transparent ‘walls’ of any sort (even using them to create vines) I could also use them to create other non-walls. Things that the engine thought of as walls, but served other aesthetic purposes.
Such as…
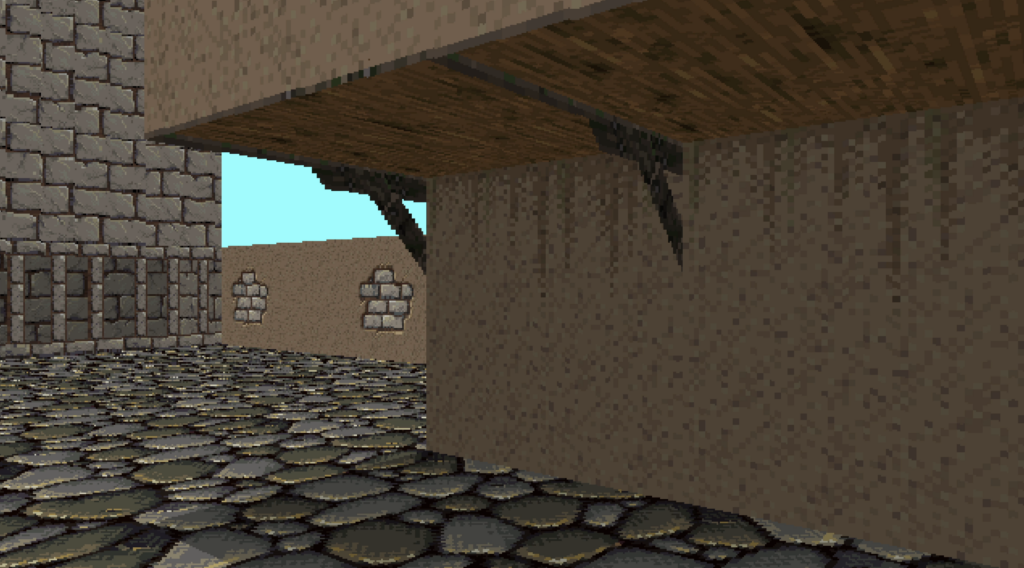
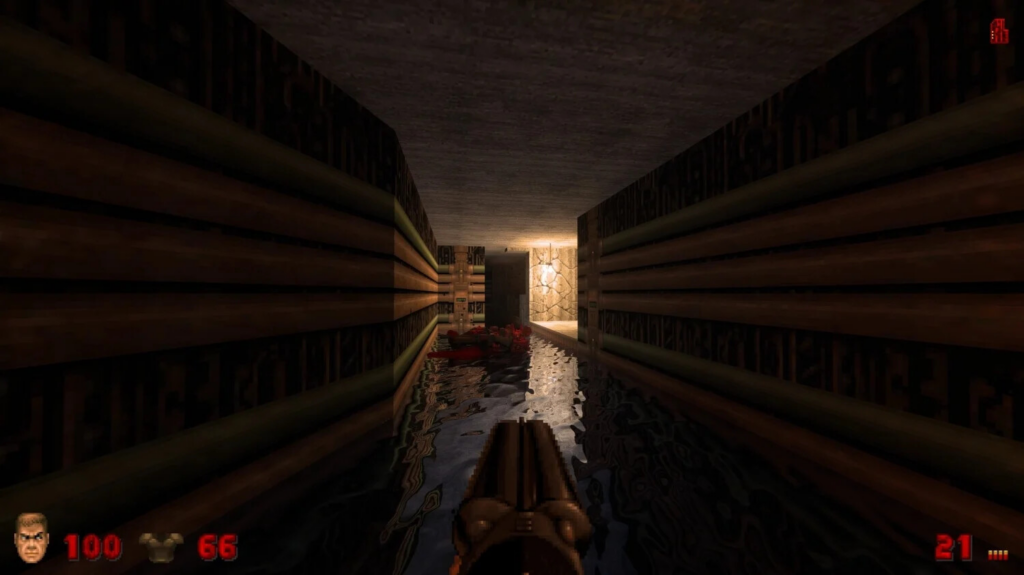
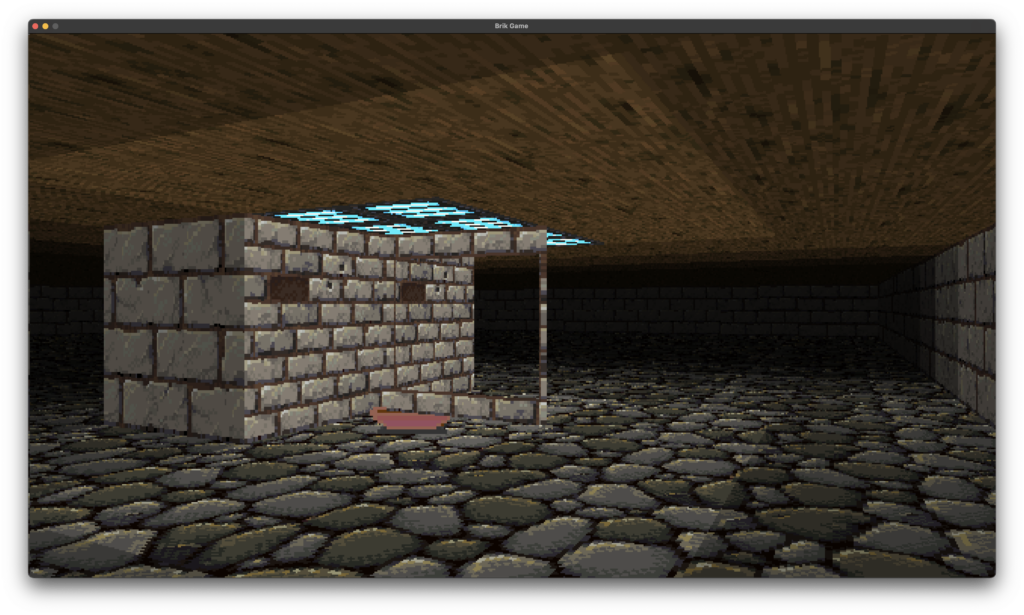
This is the culmination of all the weird features of Ray the Raycasting Engine’s work.
You can render overhanging parts of buildings, despite the engine only rendering tiles that are all the same height (64 pixels / 1.0 units).
How it’s done is pretty simple, really. The two tiles visible above have ceilings, but they also have ‘walls’. These transparent walls are used to hold the wood support struts, and simple 2 or 3 pixel wood edges. Then, above those transparent walls, you get ‘tall’ textures, which extend up into the sky and look like there is a building and rooms above them.
There are limitations, of course – there always are – but this will let me render the player entering and exiting big tall buildings.
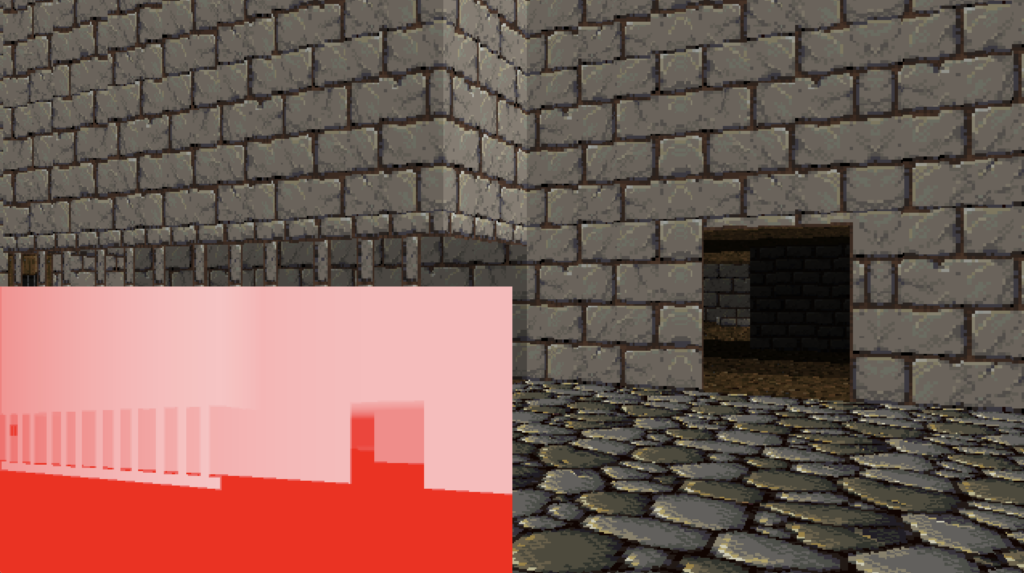
I also added another neat feature – I had a depth buffer, so I made a quick debug tool to render the depth buffer, to see how the game saw what it was rendering.
But beyond the rendering engine, there comes…
Interaction
Switches. Doors. Fortunately, these are pretty trivial to do.
In fact, when you hit the ‘use’ button, Ray the Raycasting engine already knows what you’re going to be using. Because when it renders walls and objects on the screen, it notes if they’re close to the middle of the screen and if their distance from the camera is below a certain ‘reach’ the player has, and then it remembers which of those objects are there, if they have interact flags. The up-shot?
And… more complex than that. In Deck & Conn I made functional computer terminals. So why not add those? Click ‘use’ on a terminal on the wall and bam – you’re using a computer.
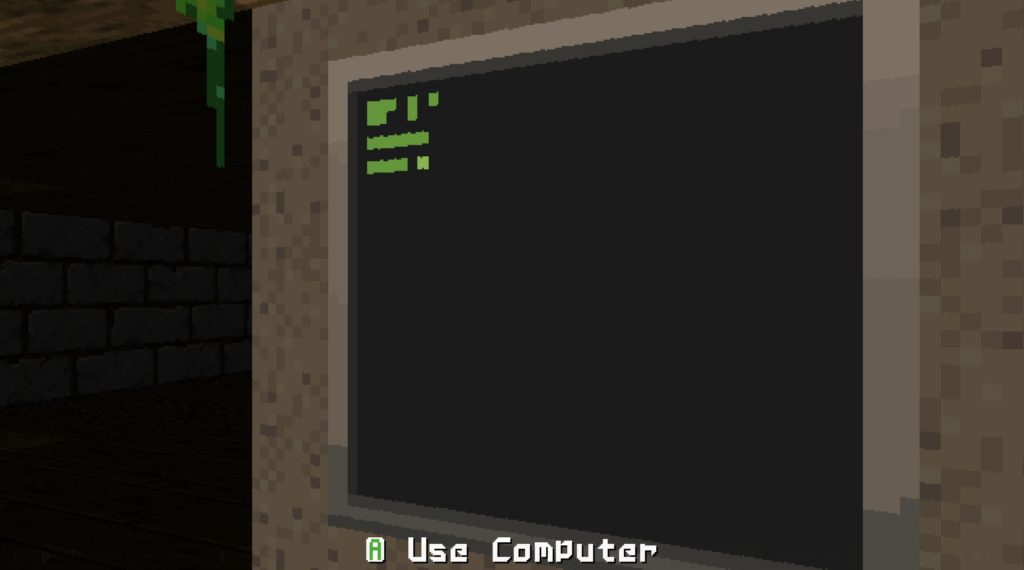
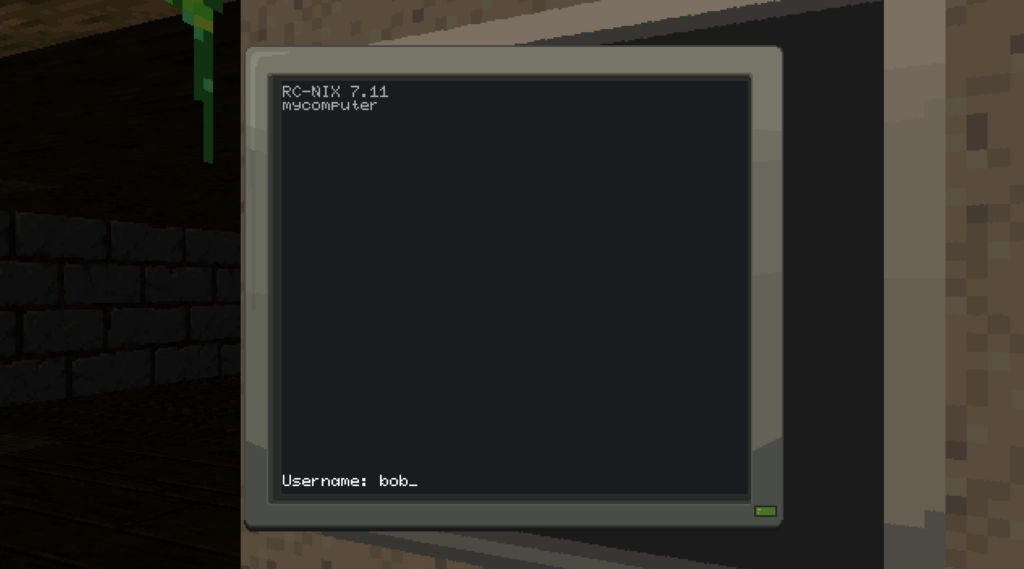
Hack the Planet!
So, by now you can probably get a sense of what I may end up doing with this engine.
I mean, I have a rough idea. I’ve even figured out which of my many vague game ideas I’ve had over the past decades are a good fit for it. The specifics need fleshing out, but I have an idea of the tone of the game.
Cities. Light and dark. Hacking computers. Breaking doors. Sneaking.
A Private Detective.
Should be fun.
Notes
This blog post is a summary of weeks of play time in a raycasting engine. But I did go down several dead ends.
For instance, I attempted to build both voxel and basic 3d object rendering in software. The former was harder than I expected, and I abandoned it because I wasn’t actually that happy with how it looked even partly working in the game engine.
The latter, doing 3d objects in my renderer, was easier (and also very well documented) but felt… off. Again, it was a level of complexity which I personally felt didn’t quite seem right in the game.
I may re-visit it at some point, but right now, those were just interesting paths not fully taken, which taught me a lot.
For instance, the 3d object stuff is what got me on the path of just making a full depth buffer for my engine, rather than the quick hacks many of the other raycasting engines use. (Which they do not because they’re better, but because they were built for very slow hardware of the time, rather than modern supercomputers that happen to exist as laptops, tablets and such.)
Links
Here are some links to resources I found useful doing this. Some are tutorials, others are just posts or threads I found useful to help me learn about Raycasting engines.
- The classic LoDev raycasting tutorial – https://lodev.org/cgtutor/raycasting.html
- Another good raycasting Tutorial – https://permadi.com/1996/05/ray-casting-tutorial-table-of-contents/
- Blogs by Tim Wheeler about his own experiments with building a C raycasting engine – https://timallanwheeler.com/blog/2023/04/01/wolfenstein-3d-raycasting-in-c/